The blog of a Australian Gamer.

Wednesday, March 25, 2009

Viva La Liberation completed.

I have just set up the case in my room and put all my pc in it :D

it looks good now in its natural habitat :p


I also did some slight streamlining to the cables :p


All that means is i put garbage bag ties around them to make them roundish :p

Now i have a anti rattle case and its beautiful.... i made some mistakes but it looks great.

MyFRAG.com.au better quality photos there. and more details.

Tuesday, March 24, 2009

Almost completed.

I have been working on this case for 6 days now.... i think.... [dose math... head breaks] about 6 days :p

I have finally gotten the pics off my camera to upload to the world :p


This is what the case looked like when i got it.


I had just striped it when i took this pic... not very well i might add.


Here i was painting it in the front yard on a windy day..... do not try this... do it in a well ventilated area NOT IN THE WIND OR NEAR GRASS.


This is how the case is going.


I have just painted the last piece and hopefully by tomorrow the case will be ready to use :D

Sunday, March 22, 2009

Viva.... i just painted it black.

well after 4 days.... it looks like something weird and a little ugly :p


well i need to cover up a couple of white bits and paint my drives black before i even get close to moving my rig into this case.

oh well, this just proves that us blokes do need to read the instructions :p

i fuglied up a lot of it and had to try again again and again. so do it right the first time.

Thursday, March 19, 2009

Viva La failure

i cant do what i had in mind for the perspex on the front with mesh and LED's.

the piece of plastic i was hoping to replace isn't what i thought it would be.


so back to the drawing board....

Viva La Liberation

I have been needing a new case for my gaming Rig for quite some time, so today i Liberated a nice looking case from Tafe.

I'm going to have a Black, Silver, and Red colour scheme. the only LED's i will use will be red.

This will take me some time but i will try to keep taking photos of my progress and report here :D


I have some sweet plans for this baby, i hope it comes out nice :D

Sunday, March 1, 2009

PS1/PSX to PSP (using windows)

Im going to show you how to get PS1/PSX games onto your PSP.

[WARNING] this will not work with any games that require use of the right analog stick.
In settings you can set the game to use the analog stick as L2 and R2.

First you will need to download the files i have linked.
PSX2PSP v1.4.2 (i have included base.pbp)
Autopopstation 4

They are 2.5mb each.

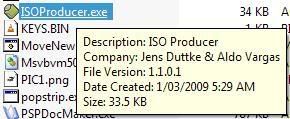
Now all you have to do is extract them to wherever suits you... Insert Your game into your drive and go into the Autopopstation 4 folder and navigate to the folder CoreData, now look for a file called ISOProducer.exe and run it.


When you open it, it should look like this.


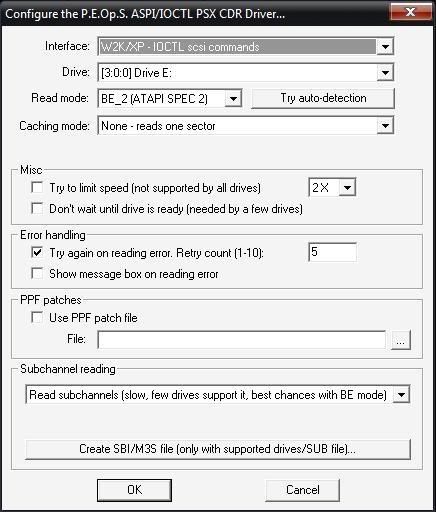
Now click on [Configure Plugin] and make sure that all the settings look the same as this.


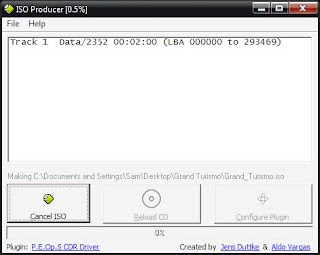
Once you have done that go ahead and click [Make ISO] you will have to select where to save the ISO.


Then once you have selected where to save and what you will call the ISO click [Save] and it should start Ripping the disc to your harddrive. [(WARNING) the title cant have any spaces or you will be unable to convert it]


When the process is complete check the folder you saved the ISO to..

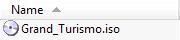
It should be around 400-700mb.

Now that you have done that its time for the next step... Conversion!
You will need PSX2PSP for this. I have been kind enough to include the Base.pbp file which you would have had to search for yourself.

Open the folder containing PSX2PSP and click on PSX2PSP.exe. it will ask which mode you want to start it in... i prefer Classic its easier to use.


Now you must select which ISO you want to Convert.


At this point it should auto detect what game it is, if not you will need the game ID. for my version of Grand Turismo the code is SCES00984, the game IS should be located either on the disc or on the spine of the Case, otherwise you will have to searching through code basses looking for it.

Next select the folder to save the converted file to.


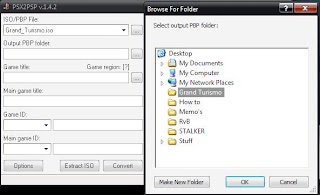
Now it should look like this. You can also select what picture files to add to the Eboot.pbp file so you can tell what game it is. i personaly cannot be bothered.

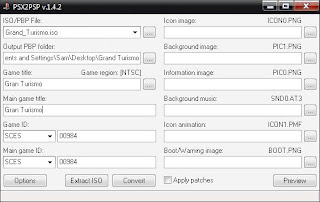
Click convert and you should be home free :D

it will create a folder where you told it to save the Eboot.pbp, the folder should have the same name as the Game ID. i that folder is the Eboot.pbp, all you have to do is copy the file onto your PSP, (I=drive letter) I:\PSP\Games\ <---- copy the folder into there :D

Have a nice Day and enjoy the games :D

Things to come...

tomorrow i will be putting up handy things for psp!

but for now i have a cold and im sweating like a pig and im gonna try and get some sleep...

i have:
playing psp games on your pc monitor...
Playing Ps1/Psx games on your psp...

and whatever else i can be bothered to do...

of course i may not be feeling up to it tomorrow so don't hold your breath, you will die :D

cyas then.

About Me

My photo
I enjoy sitting down on a comfortable couch and playing a realy good FPS or RPG, when i game i like to listen to music, mostly rock, i love bass.

Followers