The blog of a Australian Gamer.

Saturday, November 28, 2009

Benchmarks!

Finally got some benchmarks done.


3Dmark Vantage trial run.


3Dmark 05 trial run.


Far Cry 2 benchmark settings.


Results

Friday, November 20, 2009

Bleeding Edge Completed!

Bleeding Edge Is Completed!
well its built anyway :p

Getting ready with all my parts and tools.


The tank in all its empty glory!


Interior, The dvd drive isnt black on the inside... its needs a paint xD


Back cable mess...


All together.


And it only JUST fits :p


Bleeding Edge.
Cpu: Intel Core i5 750
Gpu: ECS GeForce 9600GT 1GB
Mobo: ASUS P7P55D LE
Ram: G.Skill Ripjaws F3-10666CL7D-4GBRH (2x2GB) DDR3
Psu: Vantec ION2+ N Series 600W
Hdd: WD Caviar Black 500GB WD5001AALS
Optical: Sony AD-7240S-GB DVDRW Black OEM
Case: CoolerMaster HAF932
Display: BenQ G2220HD (22" LCD) Benq FP71G+ (17" Lcd)
Sound: X-fi Xtreme Gamer, with Creative Fatal1ty headphones

Peripherals
Mouse pad: Razer Goliathus (355 x 254mm) Speed Edition
Keyboard: Microsoft Sidewinder X6
Mouse: Saitek Cyborg


For Christmas im getting a H50, then next year im getting a new gpu, ATI 5870 is what im aiming for

Monday, November 16, 2009

Pccg order

Today my order from PCCG arrived!

Cpu: Intel Core i5 750
Mobo: ASUS P7P55D LE
Ram: G.Skill Ripjaws F3-10666CL7D-4GBRH (2x2GB) DDR3
Psu: Vantec ION2+ N Series 600W
Hdd: WD Caviar Black 500GB WD5001AALS
Optical: Sony AD-7240S-GB DVDRW Black OEM
Mouse pad: Razer Goliathus (355 x 254mm) Speed Edition


Saturday, November 14, 2009

Back with even more power!

Long time no post. blogs are time consuming. time which i have ample of.

Well the time has come for me to buy Bleeding Edge (be it a slightly cut down version)

Bleeding Edge.
Cpu: Intel Core i5 750
Gpu: ECS GeForce 9600GT 1GB
Mobo: ASUS P7P55D LE
Ram: G.Skill Ripjaws F3-10666CL7D-4GBRH (2x2GB) DDR3
Psu: Vantec ION2+ N Series 600W
Hdd: WD Caviar Black 500GB WD5001AALS
Optical: Sony AD-7240S-GB DVDRW Black OEM
Case: CoolerMaster HAF932
Display: BenQ G2220HD (22" LCD) Benq FP71G+ (17" Lcd)
Sound: X-fi Xtreme Gamer, with Creative Fatal1ty headphones

Peripherals
Mouse pad: Razer Goliathus (355 x 254mm) Speed Edition
Keyboard: Microsoft Sidewinder X6
Mouse: Saitek Cyborg

Vid/pics hopefully by next Sunday. (when i have all the parts)

My current Rig Fail-Box Has had some more overheating issues... the 3850 cooked.

So i have had my spare Quadro in it for the last few months.

Now im getting bleeding edge i am doing up Fail-Box and giving it to my sister.

Fail-Box.
Cpu: 2.8Ghz Ht Pentium 4 800Mhz-Fsb. @ 3.01Ghz 860Mhz-Fsb
Gpu: GeForce 6200 256mb
Ram: 2x1GB DDR400
Hdd: 200Gb Samsung, 40gb Segate baracuda
Optical: LG DVD burner
Mobo: Albatron PX865PEC Pro V2.0
Psu: 500W Antec
Display: Benq FP71G+ (17" Lcd)
Sound: Sound Blaster 5.1 VX
Case: CoolerMaster Gladiator 600


Just gotta wait for the 6200 and soundblaster to arrive then it go's to my sister.

Cant wait for bleeding.

Monday, August 31, 2009

Liberation V2

Well now i have a new case i have my old liberation one sitting around...

So with spare parts i had lying around i have compiled a computer... minus some major components :/

All i need is...
PC2700/3200 ram.
ATX power supply.
IDE DVD drive.

Extras...
An IDE hdd, preferably like 100gb'ish...


Currently the specs are...
Mobo: P4 Titan 533, GA-8SR533 REV 2.0
CPU: P4 2ghz
GPU: Leadtek Quadro4 380 XGL
HDD: IBM Deskstar 40gb 7200rpm
Wifi: D-Link DWA-510

CPU cooler: Stock socket 478

It will have either Windows Xp or 7.


When its finished i will prob give to my sister for her graphics editing and sims :p

Tuesday, August 4, 2009

New pc specs.

due to some... overheating issues... some of my major components needed replacing...

My pc specs...
Cpu: 2.8Ghz Ht Pentium 4 800Mhz-Fsb.
Gpu: HIS HD 3850 512MB (256bit) GDDR3 AGP
Ram: 2x1GB DDR400
Hdd: 200Gb Samsung, 40gb Segate baracuda.
Optical Drive: LG DVD burner.
Mobo: Albatron PX865PEC Pro.
Psu: 500W Antec
Cpu Cooler: Massive Thermaltake thing.
Network: Inbuilt Ethernet - D-Link wireless card.
Display: 2x Benq FP71G+ (17" Lcd)
Sound: X-fi Xtreme Gamer, Creative Fatal1ty headset.
Case: CoolerMaster Gladiator 600.

Long time...

Long time and no updates... you can blame that on my laziness...

Anyway i have a new pc case! *yay*


Its a CoolerMaster Gladiator 600. i have just put a extra 92mm fan in the back to fill teh cpu cooler with air. i have also put in some 300mm cold cathodes.

Future plans are... to many to remember, but window in the side is a defo.

Saturday, April 4, 2009

Case design.

I have been quite bored so i have drawn up some case designs...

Case design

this case has mostly gloss black Grills/mesh that you can see through. the internals are illuminated by red LED's/EL wire/water cooling. the main parts of the case would be bare metal, chrome, something along those lines. the handles are on top for portability so you can go to LANs. the side panels would have 4 triangles cut out of them and either mesh/grills or Perspex.

What do you think of this design?

Wednesday, March 25, 2009

Viva La Liberation completed.

I have just set up the case in my room and put all my pc in it :D

it looks good now in its natural habitat :p


I also did some slight streamlining to the cables :p


All that means is i put garbage bag ties around them to make them roundish :p

Now i have a anti rattle case and its beautiful.... i made some mistakes but it looks great.

MyFRAG.com.au better quality photos there. and more details.

Tuesday, March 24, 2009

Almost completed.

I have been working on this case for 6 days now.... i think.... [dose math... head breaks] about 6 days :p

I have finally gotten the pics off my camera to upload to the world :p


This is what the case looked like when i got it.


I had just striped it when i took this pic... not very well i might add.


Here i was painting it in the front yard on a windy day..... do not try this... do it in a well ventilated area NOT IN THE WIND OR NEAR GRASS.


This is how the case is going.


I have just painted the last piece and hopefully by tomorrow the case will be ready to use :D

Sunday, March 22, 2009

Viva.... i just painted it black.

well after 4 days.... it looks like something weird and a little ugly :p


well i need to cover up a couple of white bits and paint my drives black before i even get close to moving my rig into this case.

oh well, this just proves that us blokes do need to read the instructions :p

i fuglied up a lot of it and had to try again again and again. so do it right the first time.

Thursday, March 19, 2009

Viva La failure

i cant do what i had in mind for the perspex on the front with mesh and LED's.

the piece of plastic i was hoping to replace isn't what i thought it would be.


so back to the drawing board....

Viva La Liberation

I have been needing a new case for my gaming Rig for quite some time, so today i Liberated a nice looking case from Tafe.

I'm going to have a Black, Silver, and Red colour scheme. the only LED's i will use will be red.

This will take me some time but i will try to keep taking photos of my progress and report here :D


I have some sweet plans for this baby, i hope it comes out nice :D

Sunday, March 1, 2009

PS1/PSX to PSP (using windows)

Im going to show you how to get PS1/PSX games onto your PSP.

[WARNING] this will not work with any games that require use of the right analog stick.
In settings you can set the game to use the analog stick as L2 and R2.

First you will need to download the files i have linked.
PSX2PSP v1.4.2 (i have included base.pbp)
Autopopstation 4

They are 2.5mb each.

Now all you have to do is extract them to wherever suits you... Insert Your game into your drive and go into the Autopopstation 4 folder and navigate to the folder CoreData, now look for a file called ISOProducer.exe and run it.


When you open it, it should look like this.


Now click on [Configure Plugin] and make sure that all the settings look the same as this.


Once you have done that go ahead and click [Make ISO] you will have to select where to save the ISO.


Then once you have selected where to save and what you will call the ISO click [Save] and it should start Ripping the disc to your harddrive. [(WARNING) the title cant have any spaces or you will be unable to convert it]


When the process is complete check the folder you saved the ISO to..

It should be around 400-700mb.

Now that you have done that its time for the next step... Conversion!
You will need PSX2PSP for this. I have been kind enough to include the Base.pbp file which you would have had to search for yourself.

Open the folder containing PSX2PSP and click on PSX2PSP.exe. it will ask which mode you want to start it in... i prefer Classic its easier to use.


Now you must select which ISO you want to Convert.


At this point it should auto detect what game it is, if not you will need the game ID. for my version of Grand Turismo the code is SCES00984, the game IS should be located either on the disc or on the spine of the Case, otherwise you will have to searching through code basses looking for it.

Next select the folder to save the converted file to.


Now it should look like this. You can also select what picture files to add to the Eboot.pbp file so you can tell what game it is. i personaly cannot be bothered.

Click convert and you should be home free :D

it will create a folder where you told it to save the Eboot.pbp, the folder should have the same name as the Game ID. i that folder is the Eboot.pbp, all you have to do is copy the file onto your PSP, (I=drive letter) I:\PSP\Games\ <---- copy the folder into there :D

Have a nice Day and enjoy the games :D

Things to come...

tomorrow i will be putting up handy things for psp!

but for now i have a cold and im sweating like a pig and im gonna try and get some sleep...

i have:
playing psp games on your pc monitor...
Playing Ps1/Psx games on your psp...

and whatever else i can be bothered to do...

of course i may not be feeling up to it tomorrow so don't hold your breath, you will die :D

cyas then.

Thursday, February 26, 2009

No luck...

Well i went into EBgames to ask the manager if i had gotten the job... he said "first im sorry about not calling you but the backroom is a mess and i couldnt find your number... I was going to give you the job because you know what you are talking about, but saddly as i was looking for your number the district manager called me and told me he had just givven the position to another... im sorry and i feel like a real jerk... i will keep you in mind if i ever need to fill a position."

I then walked out of the store and threw away all my plans to upgrade my computer, buy a ps3, get a new monitor, etc....

Life is not fair.

Monday, February 9, 2009

Backspace USB mod.

I have just finished a new mod for my 2gb drive (my good one).

I used a backspace key from a old keyboard i had lying around.


What you will need:
An old keyboard that you don't want anymore.
Screwdriver.
Hot glue gun.
Something to cut a chunk out of the key, file, side cutters, dremel.
Electrical tape
A steady hand.

Oh and a usb drive :p

Read through all the steps before actually doing anything.
Step one.
Clear a space to work on. and gather everything you will need.

Step two.
Get your usb drive and take its shell off it (if you haven't already). also pull apart your keyboard... Sometimes you can just pull the keys out and others its best to pull the entire thing apart. Just remove the key you have selected (first make sure its big enough before you go pulling a perfectly good keyboard apart).

Step three.
You will need to cut a chunk out of one end of the key so the usb plug will stick out. make sure that the drive fits if not make the hole bigger.

Step four.
This step is optional, you may want to be able to see the circuitry through the glue on the bottom (depending on what you are using it may or may not be clear enough to see through). get your electrical tape and wrap it around the drive.

Step five.
Insert your drive into the key and make sure its a snug fit. now get your glue gun ready... you will need to fill up the key with glue right to the top, making sure it doesn't go everywhere. when you are done flatten it out if you wish, then let it cool.

Step six.
Plug in the drive to a nearby computer and pray you haven't overheated it :p

Enjoy this cool mod.

Saturday, February 7, 2009

Modify a thumbdrive.

well as the title suggests i have just modified my thumbdrive... this drive has been damaged so i decided to mod it.

this is a very cheap and easy mod.


this is a very simple mod that requires patience.... and of course Some Lego and superglue...

all i did was Saw, Sand, Cut, and Grind the innards out and put them together and inserted the drive into the hollow... then glued it together. but you might want a bit more info....

I'm sorry but i didn't take photos while i was making this, it didn't occur to me at the time...

Things you need...
1. 3x flat Lego pieces, make sure they are long enough... (depending on the size of your drive, you may need more but three is the easiest to do it with so don't use less)
2. Superglue. (make sure it works on plastic)

Tools you will need
1. Sandpaper. (to smooth the edges and get rid of rough bits)
2. Small files. i used the ones i got with my LOTR miniature magizine.
3. Craft knife. (you can use this to cut and if needs be, grind)
4. Hacksaw. (you may not use this but to cut some parts it makes things easier)

If you have a dremel you may not even need any of these.


Make sure you read the steps in full before you continue.

Step one.
Check what size bricks you will need... mine where 2 wide and 6 long.

Step two.
Once you have everything you need its time to start shaping...

i did a three layer design... get the brick you want to be the center, and cut everything out, now you need to leave the outside of the brick in tact, except for where you want the usb connection to stick out you need to leave a hole there. Just do this step on one of the bricks. you may want to keep to lumps on one end to help it stay together better. You may need to keep grinding away the sides making them thinner and thinner to fit your drive in. you can use a craft knife to grind away at the sides... you want to put the knife on a 70* angel. And pull it in the direction its not pointing... like this... / ----------->

make sure your drive fits and continue to the next step.


Step three.

Once you have done the center piece put that aside. Now get the piece that will be the top and cut out all the O's that are on the bottom of it. So the inside is empty. Now your drive should fit better.


Step four.

On the piece that will be the bottom and take off all the lumps except the two at the end so they can hold on to the two on the middle piece.


Step five.

Now put the bricks together in the order you want. You should have a hole big enough to fit your drive... now insert your drive to see if you made it correctly... if it doesn't fit make the holes bigger by filing away the parts that are stopping it from fitting.


Step six.
Put together all the pieces and insert your drive, glue it all together so its flat. I still had gaps around the usb so i filled it up with bluetack. I then put glue over the bluetack and used a hairdryer to dry the glue and harden the bluetack.

Since i am a impatient person i used the hairdryer to dry all the glue. You might want to just leave it to dry on its own cause it lets off some rather bad fumes.... -cough- so if you do use a hair dryer use it outside or next to a window.
Be aware that using the hairdryer dose warp your Lego and could overheat your drive, which may permanently damage it.

that should be it. just blunt the edges and sand away any ugly bits :D


its easy to mod these so go ahead don't be shy, give it a go.
if you have trouble understanding these steps leave a comment.
I take no responsibility for damage you may cause to the thumbdrive, yourself or others.

Friday, February 6, 2009

Lots of LOLZ.

one of my mates on the Mymedia sites has started a blog which he posts his prank calls :D
http://barneyskeggs.blogspot.com/

so far he has called KFC and tried to get the 11 herbs and spices :p

Thursday, February 5, 2009

Its loud... but not loud enough!

well finally i have 30 minutes worth of loudness. its really rare to have my house empty except for me..... but now it is and i have my stereo up nice and high! it has been looking like it needs some exercise for ages now.... its been gaining weight. all that dust adds up you know... HAHA!

its at 10/24 and you can hear it from the beach :p

Tuesday, February 3, 2009

Wowness!!!

i have just found out that the Nvidia GTX295 is the most powerful video card out to date :O

apparently its two GTX290's put together into one card via a SLI connection..... the IBUYPOWER X58 OMG edition can have two of them at once.... so its a quad SLI!!!

Friday, January 30, 2009

Mysterious call.....

i just got home from my 2nd swim and... mum tells me that the manager of the local Ebgames has called and i have a job interview on tuesday!!! its my dream job and i cant wait!! i thought i'd be the last person that they would call, (well maybe i am and everyone else rejected the position) wootness interview on tuesday at my favourite place in the world.... Ebgames.

Thursday, January 29, 2009

Finaly blue sky!

well its been half a week and finally the blue sky has come back :D went down to the beach for a swim and to catch some waves on my new board (read bellow post). the water is very yellow today and theres seaweed everywhere... but in my opinion that just makes it more fun :D

will soon be going back to the beach for take 2 :p gonna catch some more :p

Tuesday, January 27, 2009

IBUYPOWER X58 OMG EDITION

I have been reading PCPP (pc power play) magazine and i found this...

its the IBUYPOWER X58 OMG EDITION


Intel core i7 overclocked to 4.0GHz.
Thermalright ultra-120 extreme cooler.
Gigabyte X58 extreme motherboard.
6gb (3x 2GB) 1600MHz DDR3 RAM.
3x NVIDIA GTX280 overclocked to 650MHz in TRI-SLI.
2x 300GB western digital Raptor HDD's in Raid-0.
Samsung 1TB HDD.
Pioneer DVD-RW.
Lian-Li P80 Armorsuit case.
Khaos Jester airbrushed artwork.
1000W power supply.

all for RRP of $8999 and can be found at www.ibuypower.com.au (i cant find the omg edition but theres the normal X58 that is equivilant when maxed)

Heat+beach = Gift from above.

Yesterday i went to the beach for a swim cause the temperature was 45*C... I have a nice swim with my sister and her friend and a man comes up to me and says.. "here you go this still has a few weeks worth of use left in it" as he hands me a boogie board... i say to him "thank you" and he walks off smiling... as my 360 had just died i had taken it as a gift from god to cure me of my boredom... God bless you stranger.

Thank god for the X-clamp mod!

My 360 had recently crashed with the E74 error message... it turns out its the GPU so what i did was... the X-clamp mod :D worked like a charm, and im back gaming again!

Here is a walkthrough that my dad found. this works a treat :D

http://www.mediafire.com/file/nmnzlmcyz0x/FIX FOR THE 3RLOD.doc

Sunday, January 25, 2009

My Story :D

I wanted to tell a mate what i had done in S.T.A.L.K.E.R. in the funniest way possible, so what i did was write into a story... this is copied strait from MSN so it hasn't been polished up yet :p

Slicingwingmans tale of the vampire stalker.

part one...
i went to the bar to get a job... barman gives me a job to go kill a stalker named VAMPIRE (dun dun dun).. i accept. so i start heading to my destination... (i admit i got a bit sidetracked and killed another 30-50 guys before i got there)

part two....
i finally get to the correct part of the map... this guy is torturing a bandit for information about his bestest friend... (AWE) the bandit gives in and the stalker lets him live....

Part three...
the stalker beckons to me... i go over and talk to him... he asks me to help him ambush the bandits that have taken his bestest friend (AWE).. so i say yes i will help him.. he heads off telling me to follow...

part four...
i follow this stalker trying to save his bestest friend (AWE)... we walk past a bunch of dogs... i decide to have a bit of target practice.. i win.... we finally get to the place he wants to hold the ambush scene...

Part five...
the stalker that's trying to save his bestest friend (AWE) says to me... "hide on the other side of the road and wait for me to fire the first shot"... im like "ok"... i hide behind a bus stop... i crouch there waiting... i think to myself... "should i just use a grenade and kill them all in one easy moment...

Part six...
the stalker trying to save his bestest friend (AWE) says to me... "here they come, remember to wait for me to fire first"... so i wait... then his bestest friend (AWE) walks past and two bandits following him... i take aim at a bandits head preparing to fire... the stalker finally fires his weapon... and kills the guy i was aiming at!!!!!... so i quickly take aim at the remaining bandit and drop him like a a baby that has just pooped its nappie..... the stalker that has saved his bestest friend (AWE) says to me "come here i have some payment for you"... i walk over... he hands me 2500ru and a scope... he says this is all i have to offer thank you for your help...

Part six...
after successfully helping the stalker trying to save his bestest friend (AWE) i walk off folowing the bearings to the vampire stalker... i come across a abandoned farm..... i walk in the front gate and a stalker beckons to me... (i hate it when people beckon me its getting old...) so i go over...

he says to me... i found this gun yesterday any person in his right mind would buy it for 800ru... having almost 100,000ru i decide its worth a risk... i give him the money and he says... "wait here I'll go get it"...

Part seven...
the gun man walks away.... i wait... he calls me on my radio and says... "hay stalker have you ever heard of robin hood?... Well i have just taken from the rich and now this money is going to feed me"... now im getting really angry... then he has the nerve to say... "never step foot here again or you will never wake up again"...

Part eight...
with that being said i get very angry and shout... "YOU JERK!!! i hate you and your not so merry men!!! now prepare to DIE!!!" i pull out my machine sniper, aim right at his head, and fire... he Buckles over dead and lands in his camp fire... all his not so merry men see this, they instantly stand up and pull out their girly smg's... i take aim again and shoot yet another in the head, he then lands in the already thriving fire... then all his mates are getting very worried... im now so angry that i decide to spray and pray... all the not so merry men fall down never to get up again...

Part nine...
my PDA beeps... i check it, it says that i have killed the vampire stalker... i walk over to the bodies... sure enough the second body in the fire is the vampire stalker... satisfied with my job i walk away to head back to the bar for a hard earned drink..... on my way to the exit of the valley i see the bandit that was freed and let to live by the stalker trying to save his bestest friend (AWE)... i walk over and he starts moaning.... he is some distance from where i last saw him... i look at him.. he pleas... i look closer at him... and without warning!!! i shoot him in the head with my pistol...

then i walk home and live happily ever after... or do i O.o

My Gaming Collection :D

Hi im Slicingwingman a Gamer from Australia.

i love FPS and RPG games... my favourite games are..

Halo (1,2,3), Final Fantasy VII series, S.T.A.L.K.E.R. FarCry, Fable, God of War, Ratchet and Clank series, Killzone series.

My gaming collection includes...

Pcgames:
Diablo, Diablo 2, Diablo 2 exp, S.T.A.L.K.E.R. shadow of chernobyl, Far cry, Neverwinter nights 2, alien vs predator 2, starwars battlefront 2, worms world party, worms 4 mayhem, morowind, CSI, and a bunch of free games.
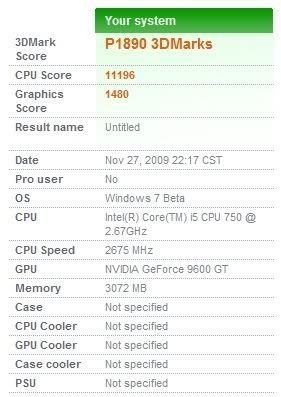
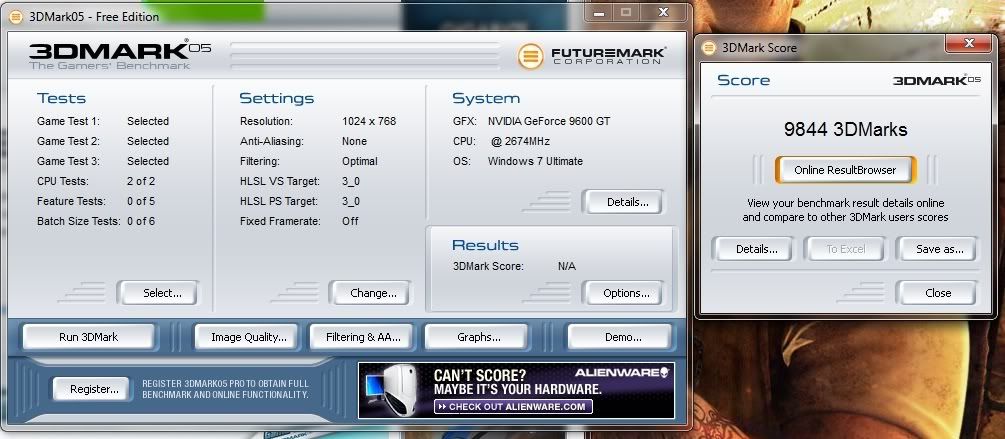
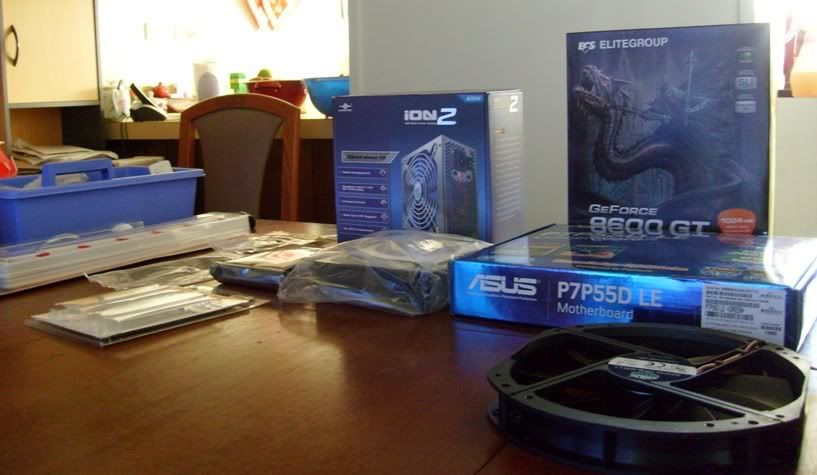
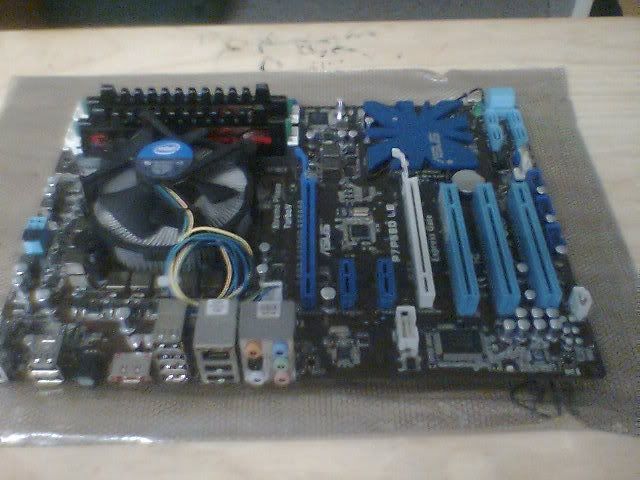
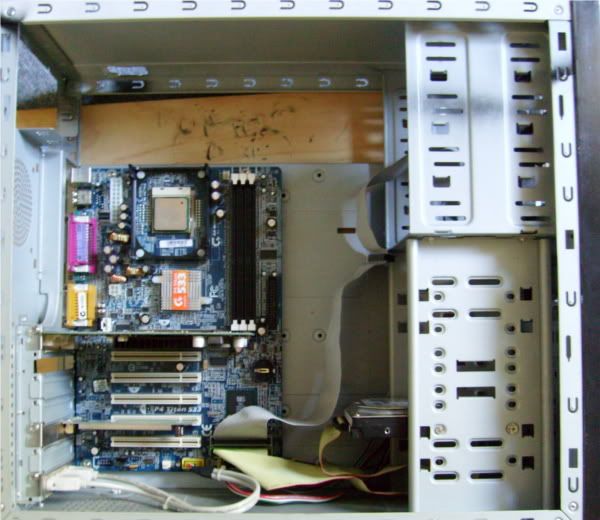
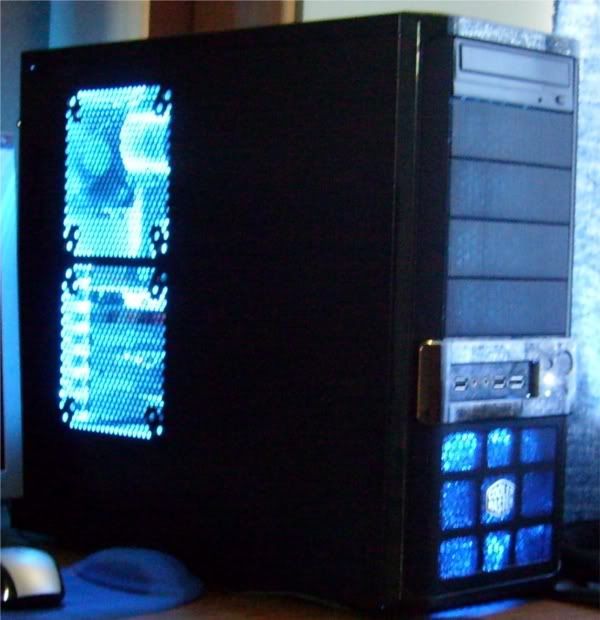
Pc specs:
Cpu: 2.4Ghz Ht Pentium 4 800Mhz-Fsb.
Gpu: Ati 9800 SE Agp-8x (omega drivers, so a pro )
Ram: 2x512Mb 800Mhz (dual Channel) (soon another 2GB)
Hdd: 200Gb.
Optical Drive: LG dvd burner, and a spare DVD reader for direct copys.
Mobo: Albatron PK865PEC Pro.
Psu: 300W
Cpu Cooler: Some Massive Thermaltake swampy type thing.
Network: Inbuilt Ethernet - D-Link wireless card.
Display: Benq FP71G+ (17" Lcd)
Sound: Inbuilt rubish card. (want a Audigy 2 or X-FI)

---------------------------

Psp games: God of war, Ratchet and clank, killzone, Crisis core, Burnout legends, medievil, worms open warefare, pursuit force, daxter.

Psp accesories: Usb data cable, dock, kung fu hustle movie, case.

---------------------------

PS2 games: killzone, gran turismo 3, need for speed underground 2, and i share about 50 with a mate.

Ps2 accesories: 5 controlers, one 8mb memory card.

---------------------------

PS1 games: Delta Force, Gran turismo, Gran turismo 2.

Ps1 accesories: 2 memory cards, 5 controllers, G-con 45 (kia at the moment)

--------------------------

Gamecube games: Sx superstar, Burnout, Super smash bros, legend of zelda wind waker, starwars bounty hunter.

Gamecube accesories: two controllers, 128mb memorycard, GBA cable.

--------------------------

GBA games: starwars lego, mario kart, banjo kazzoie.

GBA accesories: 2 cases, camera, multiplayer cable.

--------------------------

Xbox/360 games: Halo, Halo 2, Halo 3, Oblivion, Need for speed most wanted, colin mcrae dirt, perfect dark zero, assasins creed, banjo kazzoie, lost odyssey, timeshift.

Xbox 360 accesories: wireless controller, two wired controllers, 20gb hdd.

--------------------------

Snes, Nes, and 64 Emulators.
Used to have a NDSL but gave it away, when i get a job i will save up for a NDSi.
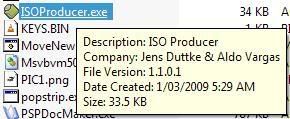
About Me

My photo
I enjoy sitting down on a comfortable couch and playing a realy good FPS or RPG, when i game i like to listen to music, mostly rock, i love bass.

Followers